EDR & SOAR Project using Limacharlie and Tines
Introduction
Join me on an exciting journey to explore how SOAR and EDR technologies can work together using LimaCharlie(EDR) and Tines(SOAR).
I’ll show you how to automate your security tasks and improve your overall cybersecurity with ease.
This guide will walk you through setting everything up and demonstrate how these tools provide instant security insights and actions. Whether you’re a security expert or just someone interested in IT, this tutorial will give you the know-how to use these powerful security tools in your setup.
Diagram Explanation
For this diagram, I used https://draw.io/. Here’s a quick Illustration
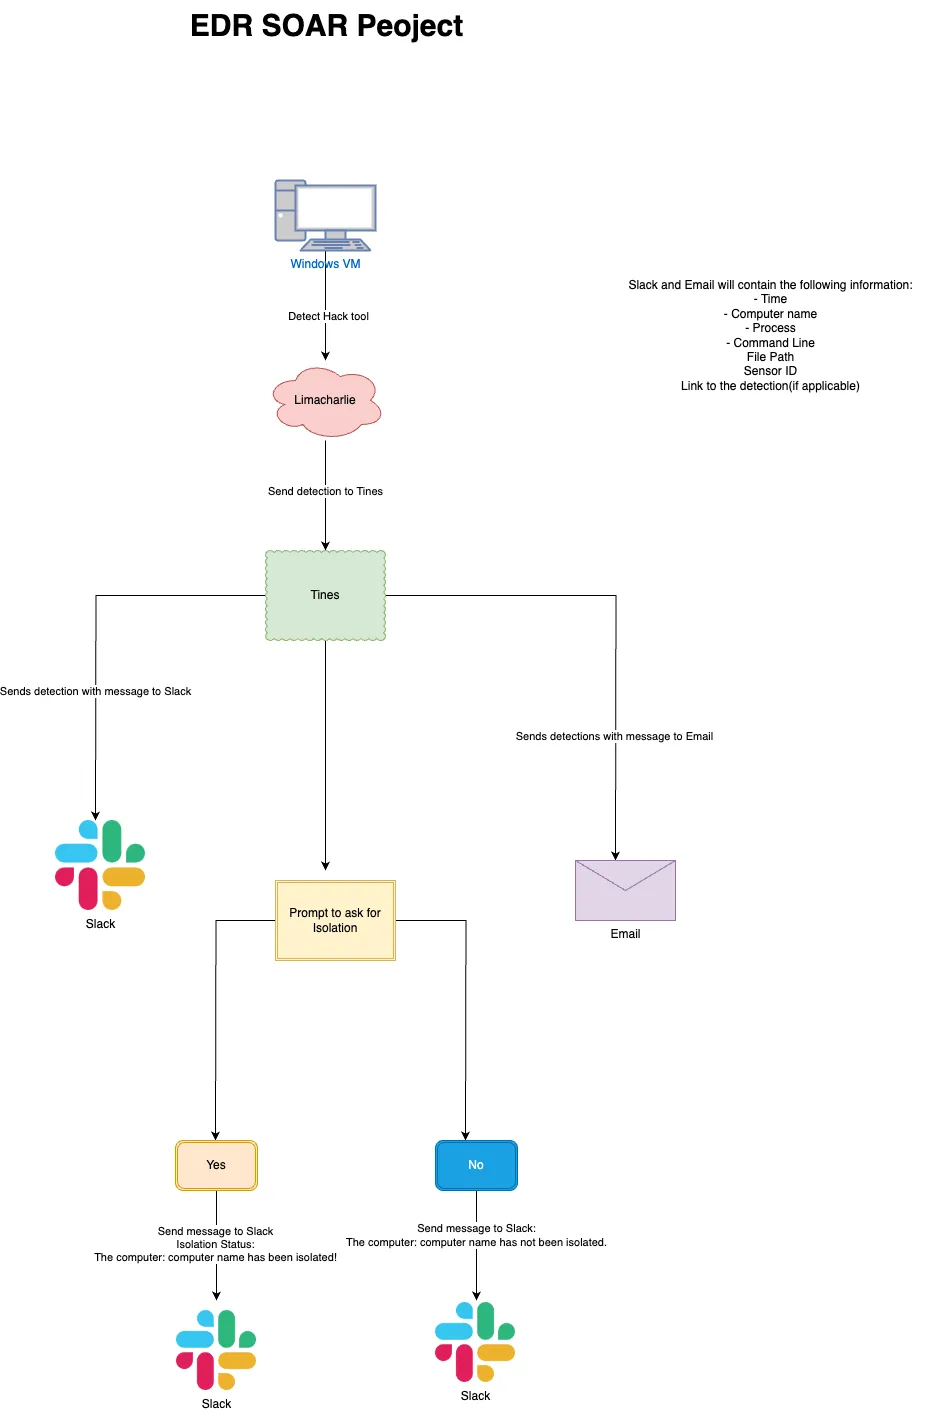
The journey starts with a Windows VM that spots a hack tool(LaZagne). When this happens, it alerts Limacharlie, which is an endpoint detection and response (EDR) tool. Limacharlie then sends this detection info over to Tines, an automation platform.
Tines takes this detection and does two things at the same time:
- Sends a detection alert to Slack.
- Sends a detection alert to Email.
Both the Slack and Email messages contain:
- Time
- Computer name
- Process
- Command Line
- File Path
- Sensor ID
- Link to the detection (if there’s one)
Next, Tines asks for a decision on whether to isolate the infected computer.
If the answer is “Yes”:
- A message goes to Slack saying the computer (with the computer name) has been isolated.
If the answer is “No”:
- A message goes to Slack saying the computer (with the computer name) has not been isolated.
Benefits
- Enhanced threat detection and response capabilities.
- Improved incident response times and efficiency.
- Reduced manual intervention through automation.
Requirements
- Windows 10 Virtual Machine
- Limacharlie.io account
- Tines.com account
- Sample Hack tool(Lazagne)
Limacharlie.io Setup -PT1
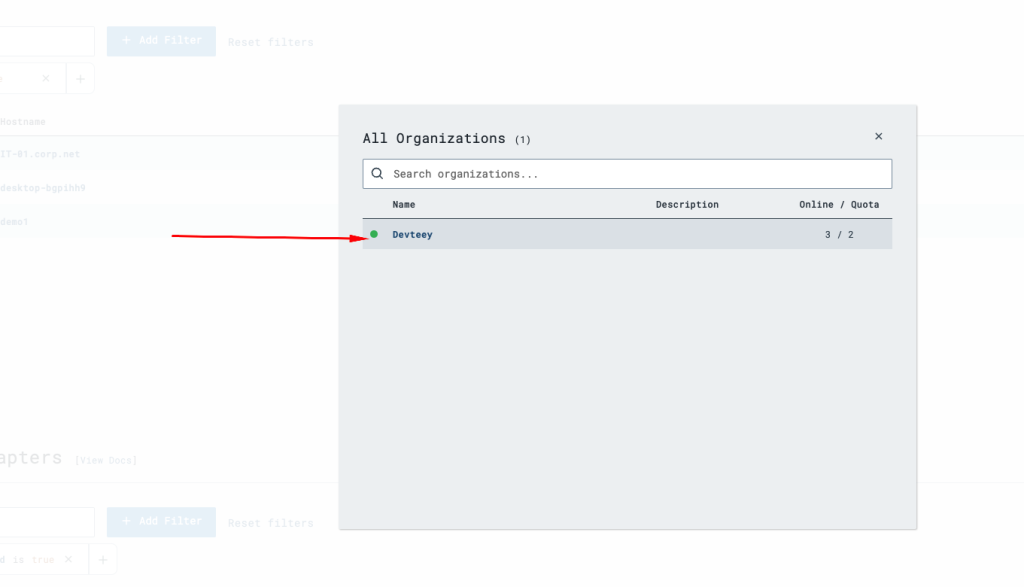
Create an account on Limacharlie.io to setup the VM with the Limacharlie EDR. After creating an account, you’ll be required to create an organization. I created mine as Devteey as shown here:
When the organization has been created, you can now add your sensor(sensor in this case is the Windows 10 VM).
Click on the sensor >> Sensors List >> Add Sensor.
Under Choose a Sensor type, select endpoint and select windows. You’ll create a new installation key by clicking Create new as shown here:
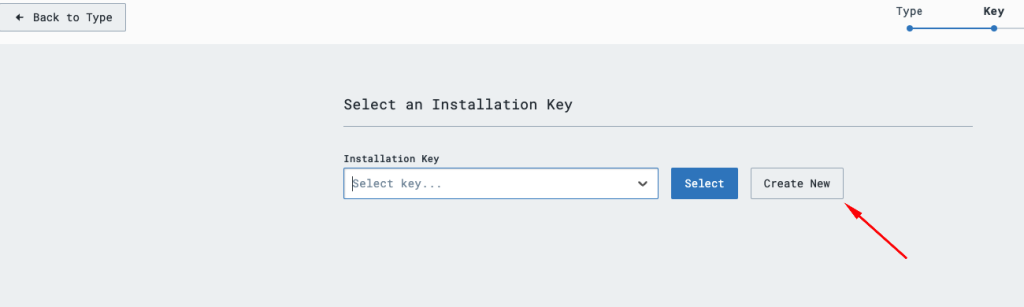
Click the select button after selecting the Installation key.
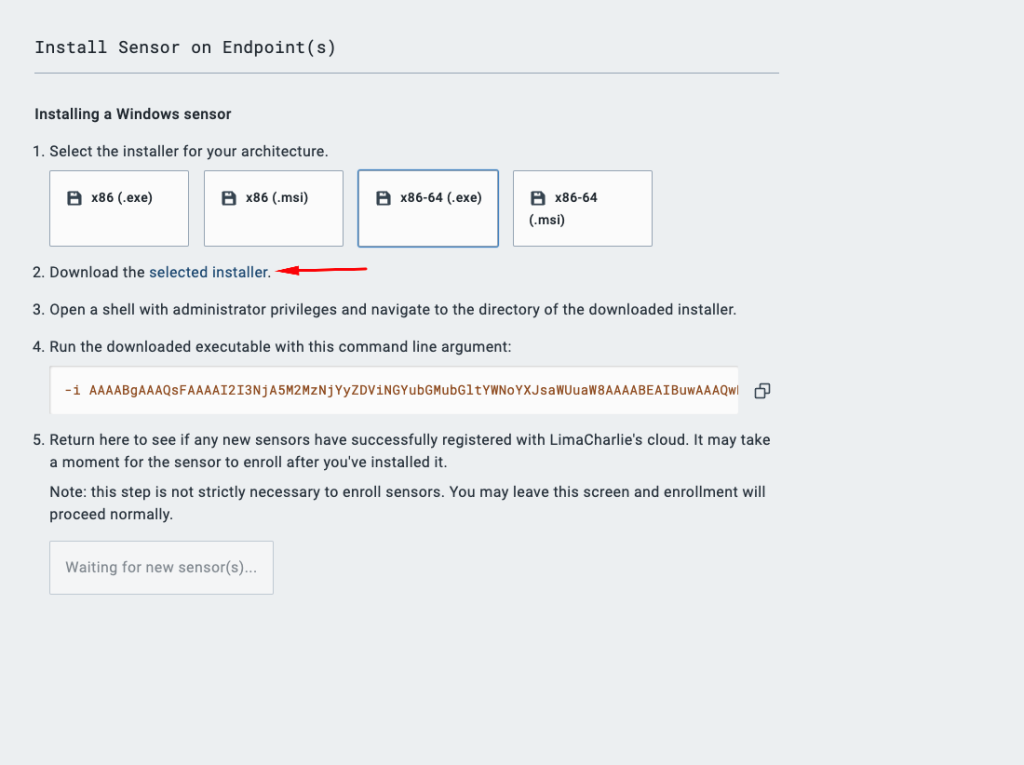
On the next page, you’ll need to select the right installation based on your system architecture. You can find out your system architecture by going to settings >> About in your windows machine. You’ll notice the system type and select the right one.
Make sure you download the installer by clicking on this text(with the red arrow):
Windows VM Setup
On your Windows VM, make sure you follow the Limacharlie installation steps as shown above.
For instance, if you have downloaded the executable, you can open Powershell in admin mode and go to the folder where it the executable is located and run: hcpxxxxx.exe -i AAABBBBJOUUBOSXXXXXXXXXXXXXXXXX.(this is not the actual command to run, the guide above explains it more.
After installation, you should be able to start accessing your files from Limacharlie and also manually isolate and allow the VM back on the network using Limacharlie.
On the Windows VM, for this project to work, we’ll need to also disable the Windows Security by pressing the windows key on your keyboard, type “security” >> Virus & threat protection settings >> Manage settings and turn off “Real-time protection”.
After turning off the protection, you can now download the hack tool. The hack tool we’ll be trying to detect is called Lazagne and you can download it from this Github Repo.
Now, your browser would not want you to download the file but click on the keep option and you should be good to go.
Now, open Windows Powershell and go to to the folder where the Lazagne executable has been installed and run “.\LaZagne.exe”
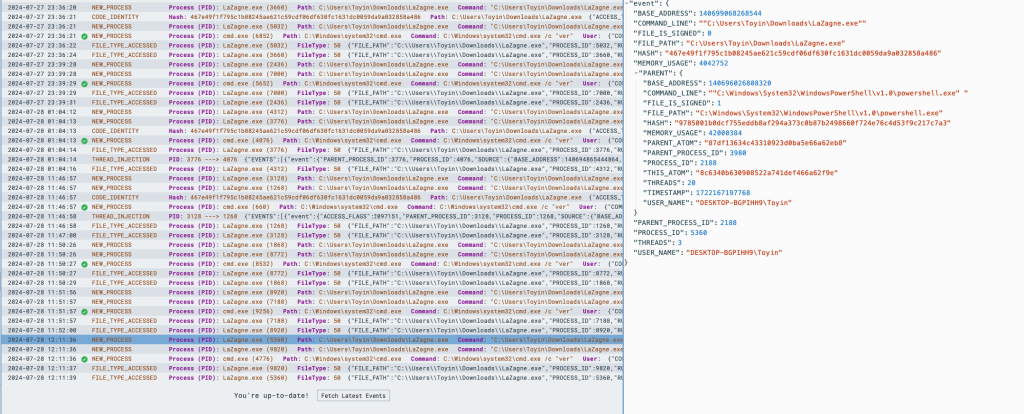
If it successfully runs, you should be able to notice this in Limacharlie as shown here:
Limacharlie Setup – PT 2
When your Windows VM has now been conneceted to Limacharlie, you can now see the real time timeline of services running on the Windows VM remotely.
To view the real-time services, go to Sensors >> Select the correct Windows VM sensor. On the left hand side, you would see some menu items, you can click on Timeline as shown here:

Clicking that shows you all the services and background tasks running on that VM.
Now, we are going to try to detect the LaZagne hack tool automatically and send the information of this detection to Tines.
Remember we want to send the following information to Tines:
- Time
- Computer Name
- Process
- Command Line
- File Path
- Sensor ID
- Link to the detection (if applicable)
To do this, we go to back to the main Organization page and click on “Automation” >> D&R rules and paste the following Rule
https://github.com/toyinogun/SOAR_EDR-D-R-Rule/blob/main/D%26R%20Rule
Kindly note that from Line 21 of the D&R rule goes to the respond section of Limacharlie. I recommend learning more about D & R rules here.
After doing that, go to the main organization page on Limacharlie and go to Outputs. For the outputs, you’ll need a webhook URL from Tines as that’s where the outputs would be sent to.
Go to Tines, create a new story and drag the Webhook module to the page. On the right hand side of the page, you’ll notice a webhook URL
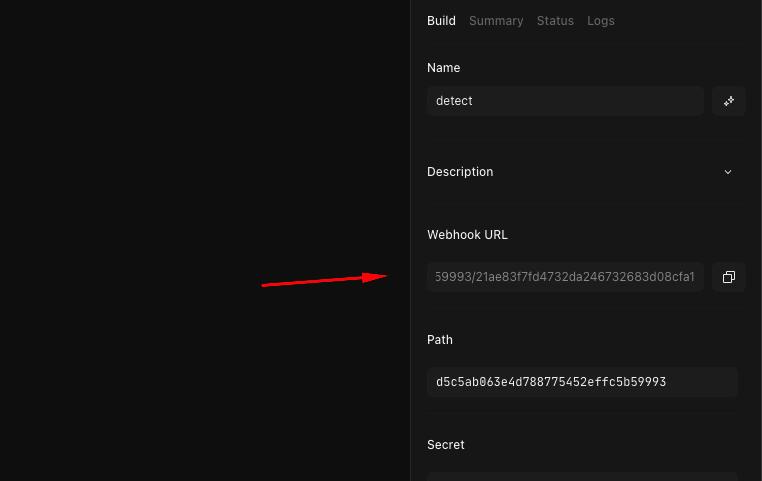
Copy that URL and paste it as the destination field for the output of your detections.
Now, as a test, run the Lazagne tool using Powershell on your Windows VM and you should be able to see the event been automatcially detected in Limacharlie and also sent to Tines.
Tines Setup
After Limacharlie and the Windows VM have been successfully setup, then you’ll need to setup Tines to automate the process when a hack tool has been run on the windows VM(check the diagram to see the Tines workflow).
Tines is used to automate the processes a SOC Analyst would do to enhance threat detection and response capabilities.
For better understanding, I used this video from MyDFIR to help create this project. You can watch here:
I hope this helps. If you have any questions, please leave a comment and I’ll do my best to get in touch with your as soon as possible.